Best Type of Gravel for Driveway: A Pro's Guide
If you live in the Northeast, you know our weather can be tough on outdoor surfaces. From heavy rain to cycles of freezing and thawing, driveways take a serious beating. This is where gravel truly excels, offering superior drainage and flexibility that asphalt and concrete can't match. But not all gravel is created equal. To build a driveway that can withstand our challenging climate, you need to choose your materials wisely. We’ll explore the key factors to consider, ensuring you find the best type of gravel for a driveway that remains stable, functional, and attractive through every season.
Key Takeaways
- Prioritize function with angular gravel: For a driveway that lasts, choose crushed, angular stones over smooth, rounded ones. The flat edges interlock to create a stable, compact surface that prevents shifting and rutting, which is something round stones simply cannot do.
- Build from the ground up with proper layers: A durable gravel driveway requires more than just a topcoat. A successful installation involves excavating the area, laying down geotextile fabric to prevent sinking, and building distinct, compacted layers of different-sized gravel for a solid foundation.
- Plan your volume and practice simple maintenance: Avoid guesswork by using a volume calculator to order the correct amount of gravel for each layer. Once installed, keep your driveway in top shape with occasional raking to level the surface and a fresh top-dressing when needed to maintain its depth and appearance.
What Are the Best Types of Gravel for Your Driveway?
Choosing the right gravel for your driveway can feel like a bigger decision than it is, but it really comes down to balancing looks, function, and budget. The best material for your project depends on how much traffic your driveway gets, the climate you live in, and the overall style you're aiming for. Some gravels are fantastic for creating a stable, long-lasting surface that can handle daily use, while others are better suited for a more decorative, low-traffic path.
Let's walk through the most popular options so you can find the perfect fit. From the interlocking strength of crushed stone to the smooth, natural look of decomposed granite, each type has its own set of pros and cons. Understanding these differences is the key to building a driveway that not only looks great but also holds up for years to come. We'll cover the top contenders to help you make a confident choice for your home or landscaping project. If you're looking for sand, stone, or gravel delivery, knowing what to ask for is the first step.
Crushed Stone
If durability is your top priority, crushed stone is an excellent choice. This material is made from larger rocks that have been mechanically broken down, resulting in angular, jagged edges. Unlike rounded stones, these sharp edges allow the pieces to lock together tightly when compacted, creating a remarkably stable surface. This interlocking quality is what makes crushed stone so effective at handling the weight and movement of vehicles without shifting around. It’s a practical, no-fuss option that provides excellent drainage and a solid foundation, making it one of the most reliable materials for a high-traffic driveway.
Crusher Run
Think of crusher run as the ultimate base material for a solid driveway. It’s a mix of crushed stone and fine stone dust, sometimes called #411 gravel. This combination is its secret weapon. The larger stones provide strength, while the fine particles fill in the gaps, allowing the material to be packed down into an incredibly dense and smooth surface. This makes it an ideal foundation for any driveway, as it provides superior stability and helps with drainage. You can even use it as the top layer for a functional, hard-wearing driveway that resists ruts and stays put.
Pea Gravel
Pea gravel is known for its good looks. These small, smooth, rounded stones come in a beautiful array of natural colors, adding a soft, polished finish to any landscape. However, that same smoothness is its biggest drawback for a primary driveway. Because the stones are round, they don't lock together and tend to shift easily under the weight of cars or even foot traffic. This can create ruts and make walking feel a bit like treading through sand. For that reason, pea gravel is best reserved for low-traffic areas, walkways, patios, or as a decorative accent where stability isn't the main concern.
River Rock
Similar to pea gravel but larger, river rock consists of smooth, rounded stones that have been naturally shaped by water. They offer a beautiful, organic look that works well in rustic or natural landscape designs, especially for garden beds or dry creek beds. When it comes to driveways, however, they present the same challenges as pea gravel. Their rounded shape prevents them from compacting into a stable surface, causing them to roll and shift under pressure. This makes driving and walking on them difficult and can lead to an uneven surface. It’s best to use these attractive stones for decorative features rather than functional driving surfaces.
Recycled Concrete
For a budget-friendly and eco-conscious option, consider recycled concrete. This material is made from concrete that has been removed from old structures and crushed into gravel-sized pieces. Functionally, it behaves much like virgin crushed stone. The pieces are angular and irregular, allowing them to interlock and compact into a strong, stable base for a driveway. It’s a great way to reuse materials and reduce waste while still getting a durable, reliable surface. Recycled concrete is an excellent choice for a base layer and proves that sustainable landscape supplies can also be highly effective.
Decomposed Granite
Decomposed granite, or DG, offers a unique blend of natural aesthetics and firm stability. This material is a fine, sandy gravel that results from the natural weathering of granite. When compacted, the tiny particles bind together to form a solid, permeable surface that feels more like a rustic path than a loose gravel driveway. It provides a soft, earthy look in shades of tan, gray, and gold that blends beautifully into the landscape. Decomposed granite is a fantastic choice if you want a functional driveway with a more natural, less industrial appearance. It’s both attractive and practical for driving, walking, and complementing your garden design.
Finding the Perfect Fit: Gravel Size and Shape
When you’re planning a gravel driveway, it’s easy to get caught up in the color and overall look. But the secret to a driveway that stands the test of time lies in the size and shape of the stones you choose. It’s not just about aesthetics; it’s about engineering a surface that can handle vehicle weight, resist erosion, and drain properly. Using the wrong type of gravel can lead to a driveway that’s constantly developing ruts, washing away in the rain, or feeling unstable under your tires.
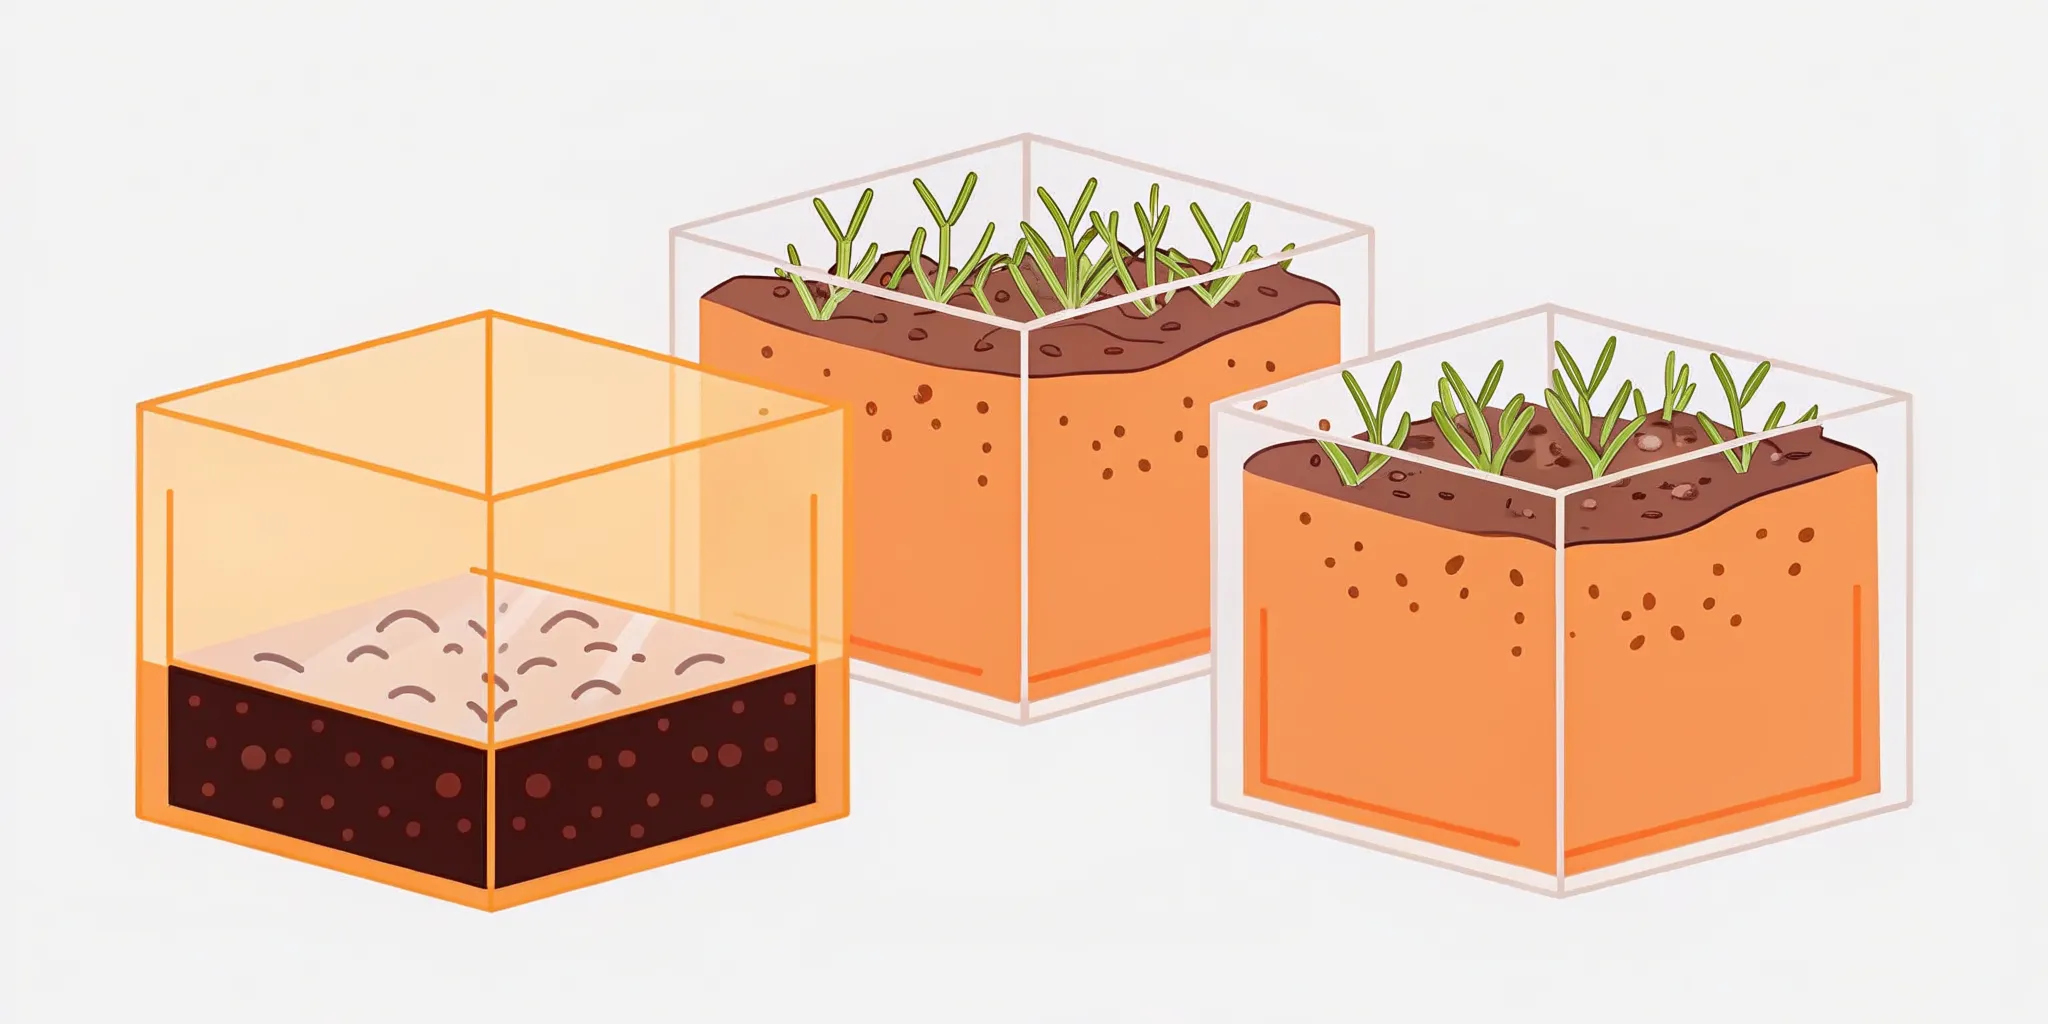
The best approach is to think of your driveway in layers. A successful gravel driveway isn’t made of just one type of stone. Instead, it’s a carefully constructed system of different-sized gravel, each layer serving a specific purpose. The large, sturdy base provides stability, the middle layer adds support, and the top layer creates a smooth, durable surface for driving. By understanding how size and shape work together, you can build a driveway that is not only beautiful but also incredibly functional and long-lasting. We’ll walk through how to select the right sand, stone, and gravel for each layer to ensure your project is a success from the ground up.
Sizing Your Base Layer
The foundation of your driveway is everything. This first, or base, layer is what provides the core strength and prevents your driveway from sinking over time. For this crucial step, you’ll want to use a large, angular crushed stone, typically around four inches in diameter. These larger stones create a solid, interlocking base that distributes the weight of vehicles effectively. Skipping this step or opting for smaller stones here is a common mistake that leads to a weak driveway. A proper base ensures excellent drainage and provides the stability needed to support the layers above it, keeping your driveway level and rut-free for years.
Choosing Your Top Layer
Once your solid base is in place, it’s time to build up the middle and top layers. The middle layer typically consists of a smaller grade of gravel, usually between two and three inches. This layer fills in the gaps of the larger base stones, adding another level of stability and creating a more even surface. Finally, the top layer is what you’ll see and drive on every day. For this, you’ll use an even finer crushed stone. This top dressing creates a compact, smooth surface that’s comfortable to drive on and gives your driveway a finished look. It also helps lock everything below it into place.
Angular vs. Rounded: Does Shape Matter?
Yes, it absolutely matters. When selecting gravel for a driveway, you should always choose crushed, angular stones over smooth, rounded ones like pea gravel. Think of it like building with blocks. Angular stones have flat edges and sharp points that lock together tightly when compacted, creating a stable, unified surface. Rounded stones, on the other hand, act more like marbles. They will shift, roll, and slide against each other under pressure. This creates an unstable surface where car tires can sink in, struggle for traction, and displace the gravel, leading to a messy and high-maintenance driveway.
Why Layering is Key to a Lasting Driveway
Building a gravel driveway is all about creating a system, and layering is the method that makes it work. Each layer performs a distinct and vital function. The large, angular base provides the heavy-duty drainage and structural support. The middle layer adds density and locks the base in place. The fine top layer gives you a smooth, durable driving surface. By building your driveway with these distinct layers, you create a final product that is strong, drains efficiently, and stays put. Skipping the base layer, for example, can cause poor drainage, displaced gravel, and a driveway that quickly falls into disrepair. You can figure out how much material you’ll need for each layer with a simple volume calculator.
How to Install a Gravel Driveway That Lasts
A gravel driveway is a fantastic, budget-friendly choice, but its success hinges entirely on proper installation. If you cut corners, you’ll end up with a rutted, weedy mess that needs constant attention. The good news is that with the right approach and materials, you can build a durable and attractive driveway that stands the test of time. The secret isn't just in the gravel you choose, but in the layers you build beneath it. Following these steps will ensure your hard work pays off with a stable, long-lasting surface that looks great for years.
Prepare and Excavate the Area
First things first, you need a clean slate. Start by clearing the entire driveway area of grass, weeds, and any other vegetation. You’ll also want to remove the topsoil until you reach the firm subsoil beneath. For most residential driveways, this means excavating to a depth of about 8 to 12 inches. The exact depth depends on your soil type; if your ground is soft or clay-heavy, aim for the deeper end. As you excavate, make sure to grade the area so it slopes slightly away from your home or garage to prevent any water issues down the line.
Lay Down Geotextile Fabric
This is a step you absolutely cannot skip. After excavating and grading the area, roll out a heavy-duty geotextile fabric over the entire subsoil surface. This material is a game-changer for a few reasons. It acts as a barrier, preventing your gravel from sinking into the soil over time. It also helps with drainage and keeps weeds from poking through your beautiful new driveway. When laying it down, be sure to overlap the edges of the fabric by at least 12 inches to create a continuous, impenetrable layer.
Build and Compact the Base Layer
Now it’s time to build your foundation. The base layer is the most important part of your driveway’s structure, responsible for stability and load-bearing. For this, you’ll need a 4- to 6-inch layer of large, angular crushed stone, typically around 4 inches in diameter. The sharp, interlocking edges of this stone create a solid, stable base that won’t shift under the weight of a vehicle. Once you’ve spread the stone evenly, you must compact it. Using a plate compactor or a heavy roller is best to ensure the stones are tightly locked together. Getting the right stone and gravel delivered is key to starting this step correctly.
Add and Crown the Top Layer
With your base firmly in place, you can add the middle and top layers. The middle layer should be about 3 to 4 inches of smaller angular gravel (around 1.5 to 2.5 inches), which you’ll also need to compact. Finally, add your top layer, which is the gravel you’ll see and drive on every day. This is usually a 2- to 3-inch layer of finer, more decorative stone like pea gravel or crushed limestone. As you add this final layer, create a "crown" by making the center of the driveway slightly higher than the edges. This subtle arch encourages water to run off to the sides instead of pooling in the middle.
Pro Tip: Getting Compaction Right
Compaction is what separates a professional-grade driveway from a temporary one. Each layer of gravel needs to be thoroughly compacted to create a solid, unified surface. For the best results, rent a plate compactor. While a hand tamper can work for a small path, it won’t provide enough force for a driveway. For an even tighter pack, lightly mist the gravel with a hose before compacting. This little bit of moisture helps the stones and fines settle and lock together more effectively, especially if you're using a "modified" gravel that contains stone dust.
Common Installation Mistakes to Avoid
Building a driveway is a big project, and a few common missteps can undermine all your hard work. The biggest mistake is skipping the base layer or using the wrong type of stone, like rounded river rock, which will never lock together. Another critical error is forgetting the geotextile fabric, leading to a driveway that slowly sinks into the earth. Also, be sure to establish proper drainage with a crown and install sturdy edging to keep your gravel contained. Finally, don't just dump new gravel on top of an old, rutted driveway. You need to fix the underlying grade issues first. If you feel unsure about any step, it's always best to ask for guidance.
Key Factors for Choosing Your Driveway Gravel
Picking the right gravel for your driveway goes beyond just choosing a color you like. To build a driveway that looks great and holds up for years, you need to think about a few practical things first. Your local weather, the type of soil on your property, and how much traffic your driveway will see all play a big role in finding the perfect material. Balancing these needs with your budget and the final look you want will help you make a choice you’ll be happy with for a long time. Let's walk through the key factors to consider.
Your Local Climate and Weather
Here in the Northeast, we get our fair share of heavy rain and snow. This is where a gravel driveway really shines. Unlike asphalt or concrete, which can puddle or crack from freeze-thaw cycles, gravel offers fantastic drainage. Water flows down through the stones instead of sitting on the surface, which means fewer puddles, less ice in the winter, and a reduced risk of ruts forming over time. Choosing a gravel that drains well is essential for a low-maintenance driveway that can handle whatever our local climate throws at it.
Soil Type and Drainage Needs
Before you lay down any gravel, take a look at your property’s soil. If you have heavy clay soil, which is common in parts of our region, drainage can be a challenge. A properly installed gravel driveway helps manage this by allowing water to filter through. For the best results, your driveway should be built with a slight "crown," meaning it’s a little higher in the middle than on the sides. This shape encourages water to run off instead of pooling. Using clean, washed stone without fine particles is also great for areas that need extra drainage, like French drains alongside your driveway.
Expected Driveway Traffic
Think about how you’ll use your driveway. Will it just be for the family car, or will you have heavy delivery trucks or construction vehicles driving on it? The amount and type of traffic determines how robust your driveway needs to be. For high-traffic areas, a strong foundation is non-negotiable. This means starting with a base layer of large, angular crushed stone that can support heavy loads without shifting. The top layer should also consist of smaller, angular stones that lock together to create a stable, durable surface that won’t easily form ruts.
Your Budget and Local Availability
Gravel is one of the most budget-friendly options for a driveway, but costs can vary based on the type of stone you choose. Sourcing your materials from a local supplier is a smart way to keep costs down, especially when it comes to delivery. Plus, using locally available stone often means it will blend in beautifully with the natural landscape of your area. At Organic Recycling, we offer a variety of high-quality masonry supplies that are perfect for creating a lasting and attractive driveway that fits your budget.
The Look You Want to Achieve
Finally, let’s talk about aesthetics. The right gravel can seriously enhance your home’s curb appeal. You can choose from a range of colors, from classic gray and white to warmer tans and reds, to complement your home’s exterior and landscaping. The size and shape of the stone also contribute to the overall look. For a polished, cohesive appearance, consider adding edging made of stone or brick. And if your driveway starts to look a bit worn over time, a fresh top-dressing of gravel is an easy way to restore its smoothness and color.
Calculating and Maintaining Your Gravel Driveway
Once your driveway is installed, a little bit of care will keep it looking sharp and functioning well for years. The two main parts of long-term success are getting the right amount of gravel from the start and performing some simple, routine upkeep. Miscalculating your initial volume is one of the most common slip-ups, leading to a thin, patchy driveway or a surplus of material you have to figure out what to do with.
Fortunately, both the math and the maintenance are pretty straightforward. You don’t need special equipment or a lot of time to keep your driveway in great shape. A good rake, a watchful eye, and an occasional top-off are usually all it takes. Think of it like any other part of your landscape; a bit of attention now and then prevents bigger headaches down the road. By planning ahead and staying on top of maintenance, you ensure your investment remains a durable and attractive feature of your home.
How Much Gravel Do You Really Need?
Figuring out the right amount of gravel is the first step to a successful project. Ordering too little leaves you with a thin, unstable surface, while ordering too much means wasted material and money. To get an accurate estimate, you need to measure the length and width of your driveway to find the square footage. Then, decide on the depth of your gravel layers. A typical driveway needs a total depth of at least 8 to 12 inches, spread across a few layers. Our handy volume calculator can take the guesswork out of the equation. Just plug in your dimensions, and it will tell you exactly how many cubic yards you need for your project.
Calculating for Each Layer
A durable gravel driveway isn’t built with just one type of stone. It’s a system of layers working together. The base layer needs large, angular stones (around 4 inches) to create a stable foundation that won't shift under pressure. The middle layer uses smaller stones (2 to 3 inches) to lock the base in place and fill gaps. Finally, the top layer is your decorative stone, which should be smaller and more comfortable to walk and drive on. You’ll need to calculate the volume for each layer separately to ensure you order the right amount of each type of stone from our landscape supplies. This layered method is the secret to preventing ruts and improving drainage.
Simple Upkeep: Raking and Leveling
Over time, traffic and weather will cause your gravel to shift, creating low spots, ruts, or thin areas. The easiest way to fix this is with a sturdy landscape rake. A few times a year, walk your driveway and rake the gravel from the high spots into the low ones. This simple action redistributes the stone, smooths out the surface, and keeps your driveway looking neat and even. It only takes a few minutes but makes a huge difference in both the appearance and longevity of your driveway. Think of it as a quick touch-up that prevents small issues from becoming bigger problems.
Topping Off and Fixing Bare Patches
Even with regular raking, you'll eventually lose some gravel. Stones get pressed into the soil, kicked to the side, or washed away by heavy rain. When you start to see bare or thin patches, it’s time for a top-dressing. This just means adding a fresh layer of your top gravel to restore the driveway's depth and appearance. A new layer can instantly refresh the look of your entire property and improve curb appeal. When you're ready for a refresh, you can schedule a quick sand, stone, and gravel delivery to get exactly what you need dropped off right at your home.
A Quick Guide to Seasonal Maintenance
A little seasonal care will keep your driveway in top form. In the spring, check for any low spots or drainage issues that developed over the winter and rake them out. This is also a good time to pull any weeds that have managed to pop through. If you installed landscape fabric underneath, you should have very few. In the fall, clear away fallen leaves and debris to prevent them from breaking down and turning into soil, which can encourage weed growth. Regularly checking the edging and ensuring it's still containing the gravel will also help maintain the driveway's shape and structure year-round.
Common Gravel Driveway Mistakes (and How to Avoid Them)
Building a gravel driveway seems straightforward, but a few common missteps can lead to a lumpy, rut-filled mess that requires constant fixing. Getting it right the first time saves you a lot of headaches, time, and money down the road. By avoiding these frequent errors, you can create a durable, attractive driveway that stands up to weather and traffic for years to come. Let’s walk through the most common mistakes and, more importantly, how you can steer clear of them.
Choosing Rounded Over Angular Gravel
One of the biggest mistakes is picking gravel based on looks alone. Smooth, rounded stones like pea gravel might look pretty, but they don’t work well for a driveway’s top layer. Because they lack flat edges, these stones roll around and never lock together. This creates an unstable surface that shifts under the weight of your car, leading to ruts and displaced gravel. Instead, you should always choose an angular crushed stone for the top layer. The sharp, flat edges of angular gravel interlock tightly when compacted, forming a solid, stable surface that stays put and provides excellent traction.
Forgetting Proper Drainage and Crowning
Water is the number one enemy of a gravel driveway. If it has nowhere to go, it will pool on the surface, softening the base and creating potholes and ruts. A common mistake is building a perfectly flat driveway. The solution is to grade it correctly and give it a “crown.” This means making the center of the driveway slightly higher than the edges, creating a gentle slope of about a quarter-inch per foot. This subtle arch encourages rain and snowmelt to run off to the sides instead of soaking in. Simply dumping more gravel into low spots won't fix the underlying drainage problem; you need to shape the driveway itself for effective water management.
Skipping Crucial Base Prep
A great driveway is built like a layer cake, and the base is the most important part. Many people get excited to lay the top layer and rush through or completely skip the foundation prep. This is a recipe for failure. Without a solid base, your driveway will lack stability, leading to poor drainage and gravel that shifts and sinks over time. The correct approach is to excavate the area and lay down a thick layer of larger, compacted stone. This creates a firm foundation that distributes weight evenly and allows water to drain through. Using our volume calculator can help you figure out exactly how much base material you’ll need for a solid start.
Not Compacting Correctly
Just spreading the gravel evenly isn’t enough. Each layer of your driveway, from the sub-base to the topcoat, needs to be thoroughly compacted. Skipping this step leaves air pockets between the stones, resulting in a loose surface that will quickly develop ruts and feel spongy under your tires. For a truly durable driveway, you need to compact each layer with a heavy plate compactor or a vibratory roller. This process forces the stones to settle and interlock, creating a dense, solid surface that can withstand heavy vehicle traffic and resist erosion. Proper compaction is what transforms a simple pile of rocks into a functional, long-lasting driveway.
Installing Weak Edging
A gravel driveway without a proper border will constantly spread into your lawn and garden beds. This not only looks messy but also means you’re losing expensive material over time. A frequent mistake is using flimsy landscape edging that can’t handle the pressure or forgoing edging altogether. To keep your driveway’s shape clean and contained, you need a strong, permanent border. Sturdy options include steel edging, heavy-duty plastic, pavers, or stone blocks. These materials create a solid barrier that holds the gravel in place, defines the driveway’s edge, and gives your project a professional, finished look. You can find great options among our masonry supplies.
Related Articles
- Driveway Gravel Calculator: A Simple How-To Guide
- The Ultimate Guide to Bulk Gravel Near Me
- Sand, Gravel, Stone Delivery
- Landscape Products & Mulch Delivery | Organic Recycling
- Bulk Mulch, Soils, Sand & Stone | Organic Recycling Inc.
Frequently Asked Questions
Can I just put a new layer of gravel over my existing driveway? While it might seem like a quick fix, just dumping new gravel on top of an old, rutted driveway usually doesn't solve the problem. Ruts and low spots are often signs of a weak base or poor drainage. To get a lasting result, you should first scrape back the top layer and regrade the existing base to fix any unevenness and ensure water will run off properly. Once you have a solid, well-shaped foundation, you can then add your new top layer.
What's the best all-around gravel if I'm on a budget but still want durability? If you're looking for the best value, crusher run or recycled concrete are fantastic choices. Both materials contain a mix of angular crushed stone and fine stone dust. This combination allows them to be compacted into an incredibly dense and stable surface that resists shifting and rutting. They provide the strength you need for a high-traffic driveway without the higher cost of some more decorative stones, making them a practical and effective solution.
How do I keep weeds from taking over my gravel driveway? The single most effective thing you can do is to install a high-quality geotextile fabric underneath your gravel layers. This creates a physical barrier that stops weeds from growing up from the soil below. Beyond that, maintaining a deep enough layer of gravel (at least 4 inches for the top layers combined) will also help by blocking sunlight. Regularly raking leaves and debris off the surface prevents them from decomposing into soil that could support new weed growth.
Do I really need to use different sizes of gravel for the layers? Yes, this is the secret to a driveway that lasts. Think of it as building a pyramid: you need a wide, strong base to support everything on top. The large, 4-inch stones in the base layer create a solid, interlocking foundation that provides strength and drainage. The smaller middle and top layers fill in the gaps and create a dense, smooth surface for driving. If you use only one size of stone, you'll end up with a loose surface that shifts easily and won't hold up to traffic.
Is pea gravel ever a good choice for a driveway? Pea gravel is beautiful, but its smooth, rounded shape makes it a poor choice for the main surface where you'll be driving and parking. The stones act like little marbles, rolling and shifting under the weight of tires, which creates an unstable surface and deep ruts. However, it's an excellent option for areas with less traffic, such as garden paths, patios, or as a decorative border alongside a more stable, angular gravel driveway.